It has been several months since I posted on the blog about the progress of my project. I had written a series of posts and information pages, but the site crashed and I lost all that material. It was very disappointing, and I got distracted looking for a better blogging template or platform to use.
I finally found a WordPress template I like – “Hemlock” and I am now blogging again.
I will attempt to recreate the lost pages in this and the next posts, so this post may be quite long.
August 2019 – The purchase
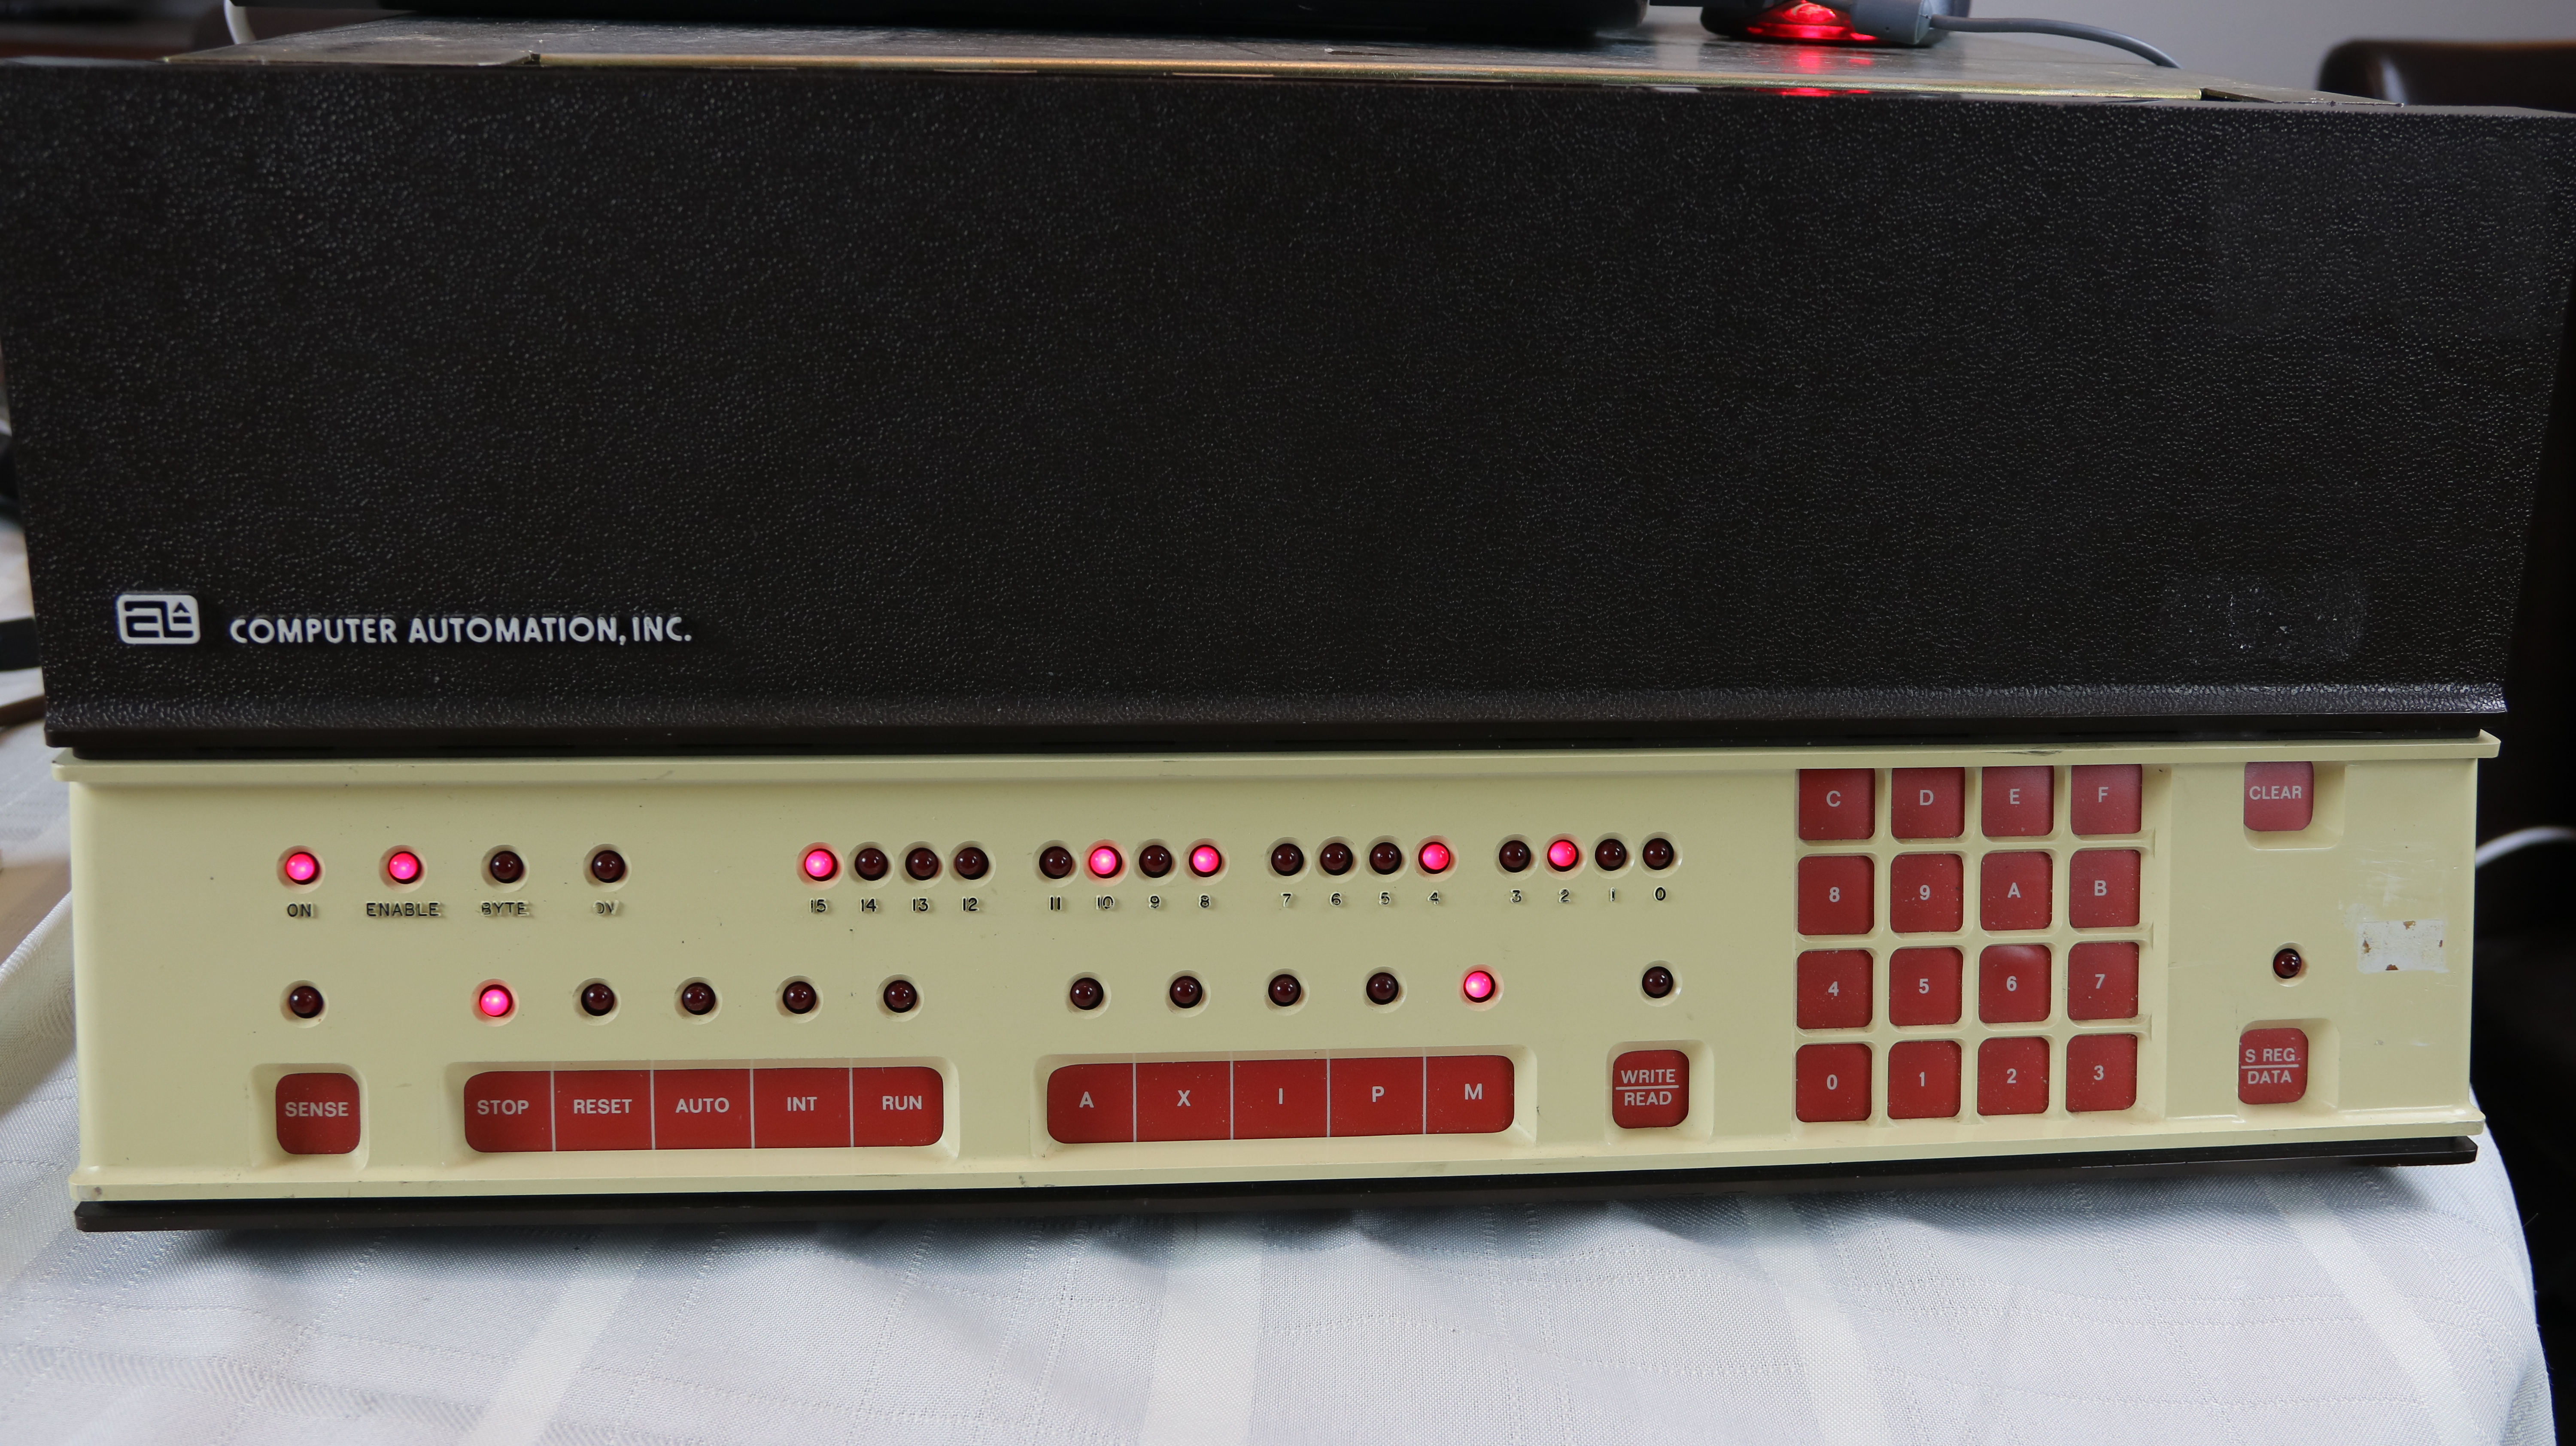
I found an Alpha LSI 2 system for sale at a surplus company in Toronto, Canada on ebay.com. I was able to negotiate a good price and I purchased it. This is the unit featured on the home page and in the chassis photos in the inventory section of this blog.
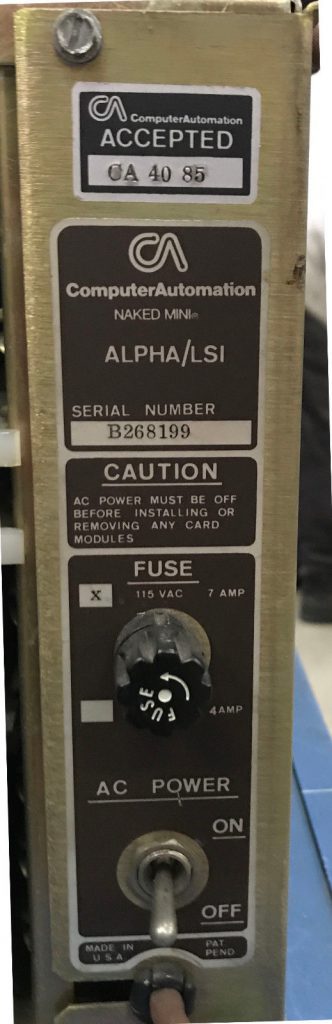
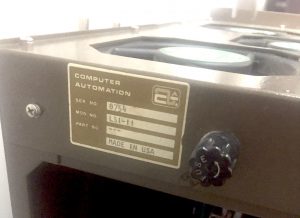
The chassis was made in the 40th week of 1985, so this is a later system produced when the product was mature.
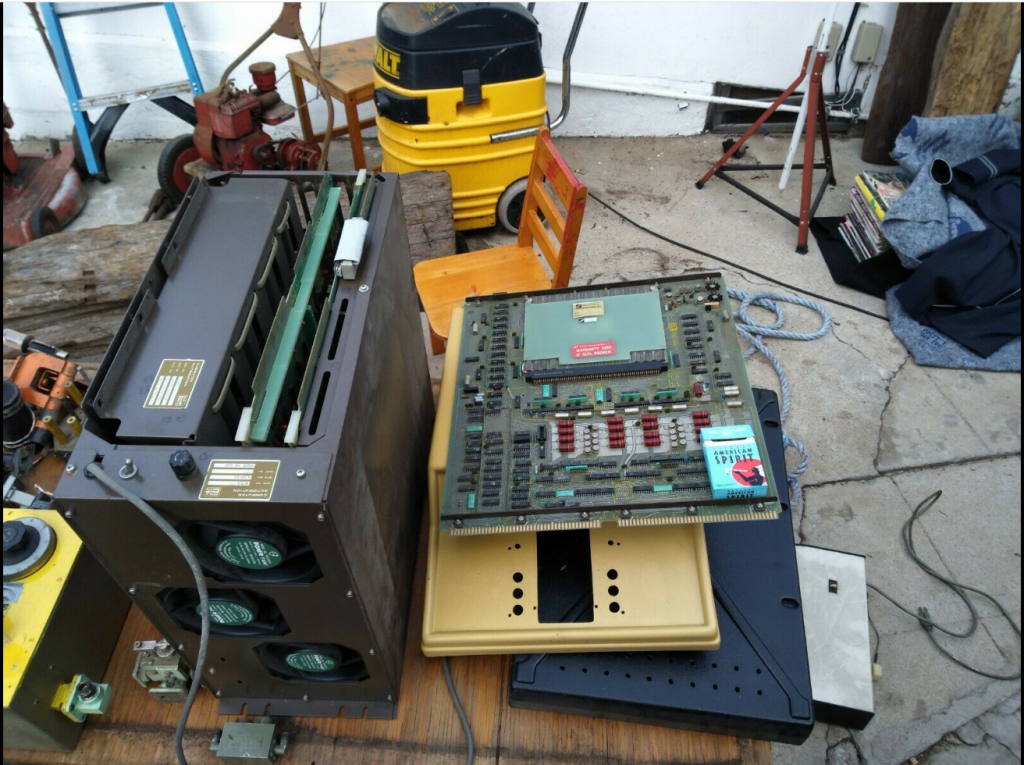
When it arrived I found it had 4 half option cards, a front panel and a power supply. No CPU, CPU options, or memory cards. Also, because the packing was not great, the weight of the power supply unit had bent the card cage chassis in several places during shipping and the cards were out of their tracks and wedged in the slots.
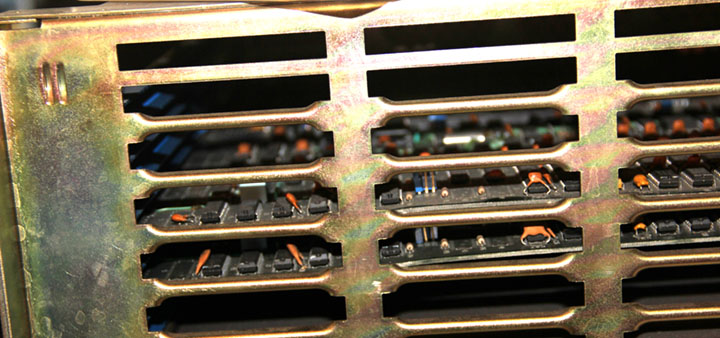
Cards outside of card cage slots/rails and wedged in position
The damage was not as serious as it seemed. I was able to use a pry bar and large screwdriver to pry the cards out of the card cage without further damaging them, and with hammer and wood block was able to straighten the chassis back to normal.
There were two 53988 32k x 16 bit semiconductor memory RAM half-cards and two custom half-cards with just a small number of TTL 7400-series integrated circuits and two connectors, probably for some type of digital I/O.
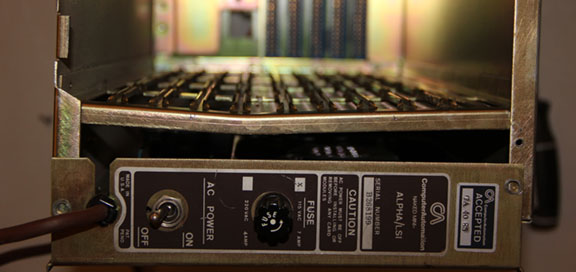
Chassis bent in shipping
Finding parts – CPU and option cards
I began to search on ebay.com for more boards and to my surprise a number of Computer Automation boards began to appear for sale on ebay. Over the years I had seen very few items but recently a large number of components have been on offer.
By careful shopping, I was able to find LSI-2/20 CPU cards, CPU micro code ROM daughter board and CPU/TTY option cards, CORE and RAM memory cards, and a few I/O cards. Of course, I had no idea if any of these cards still worked or would function together.
I also purchased some new card edge connectors for use with the option cards and the I/O boards. It is actually hard to find some solder tab card edge connectors these days – many sizes are no longer stocked, and I had to search several online electronics surplus stores for some of these connectors.
February 2020
The first steps after getting some cards for the machine and straightening the chassis was to test the power supply. Mini-computers from the 1970’s have massive linear power supplies with huge transformers delivering 20-30 amps at 5 and 12 volts DC. They are very heavy – I think the power supply module weighs over 50 lbs.
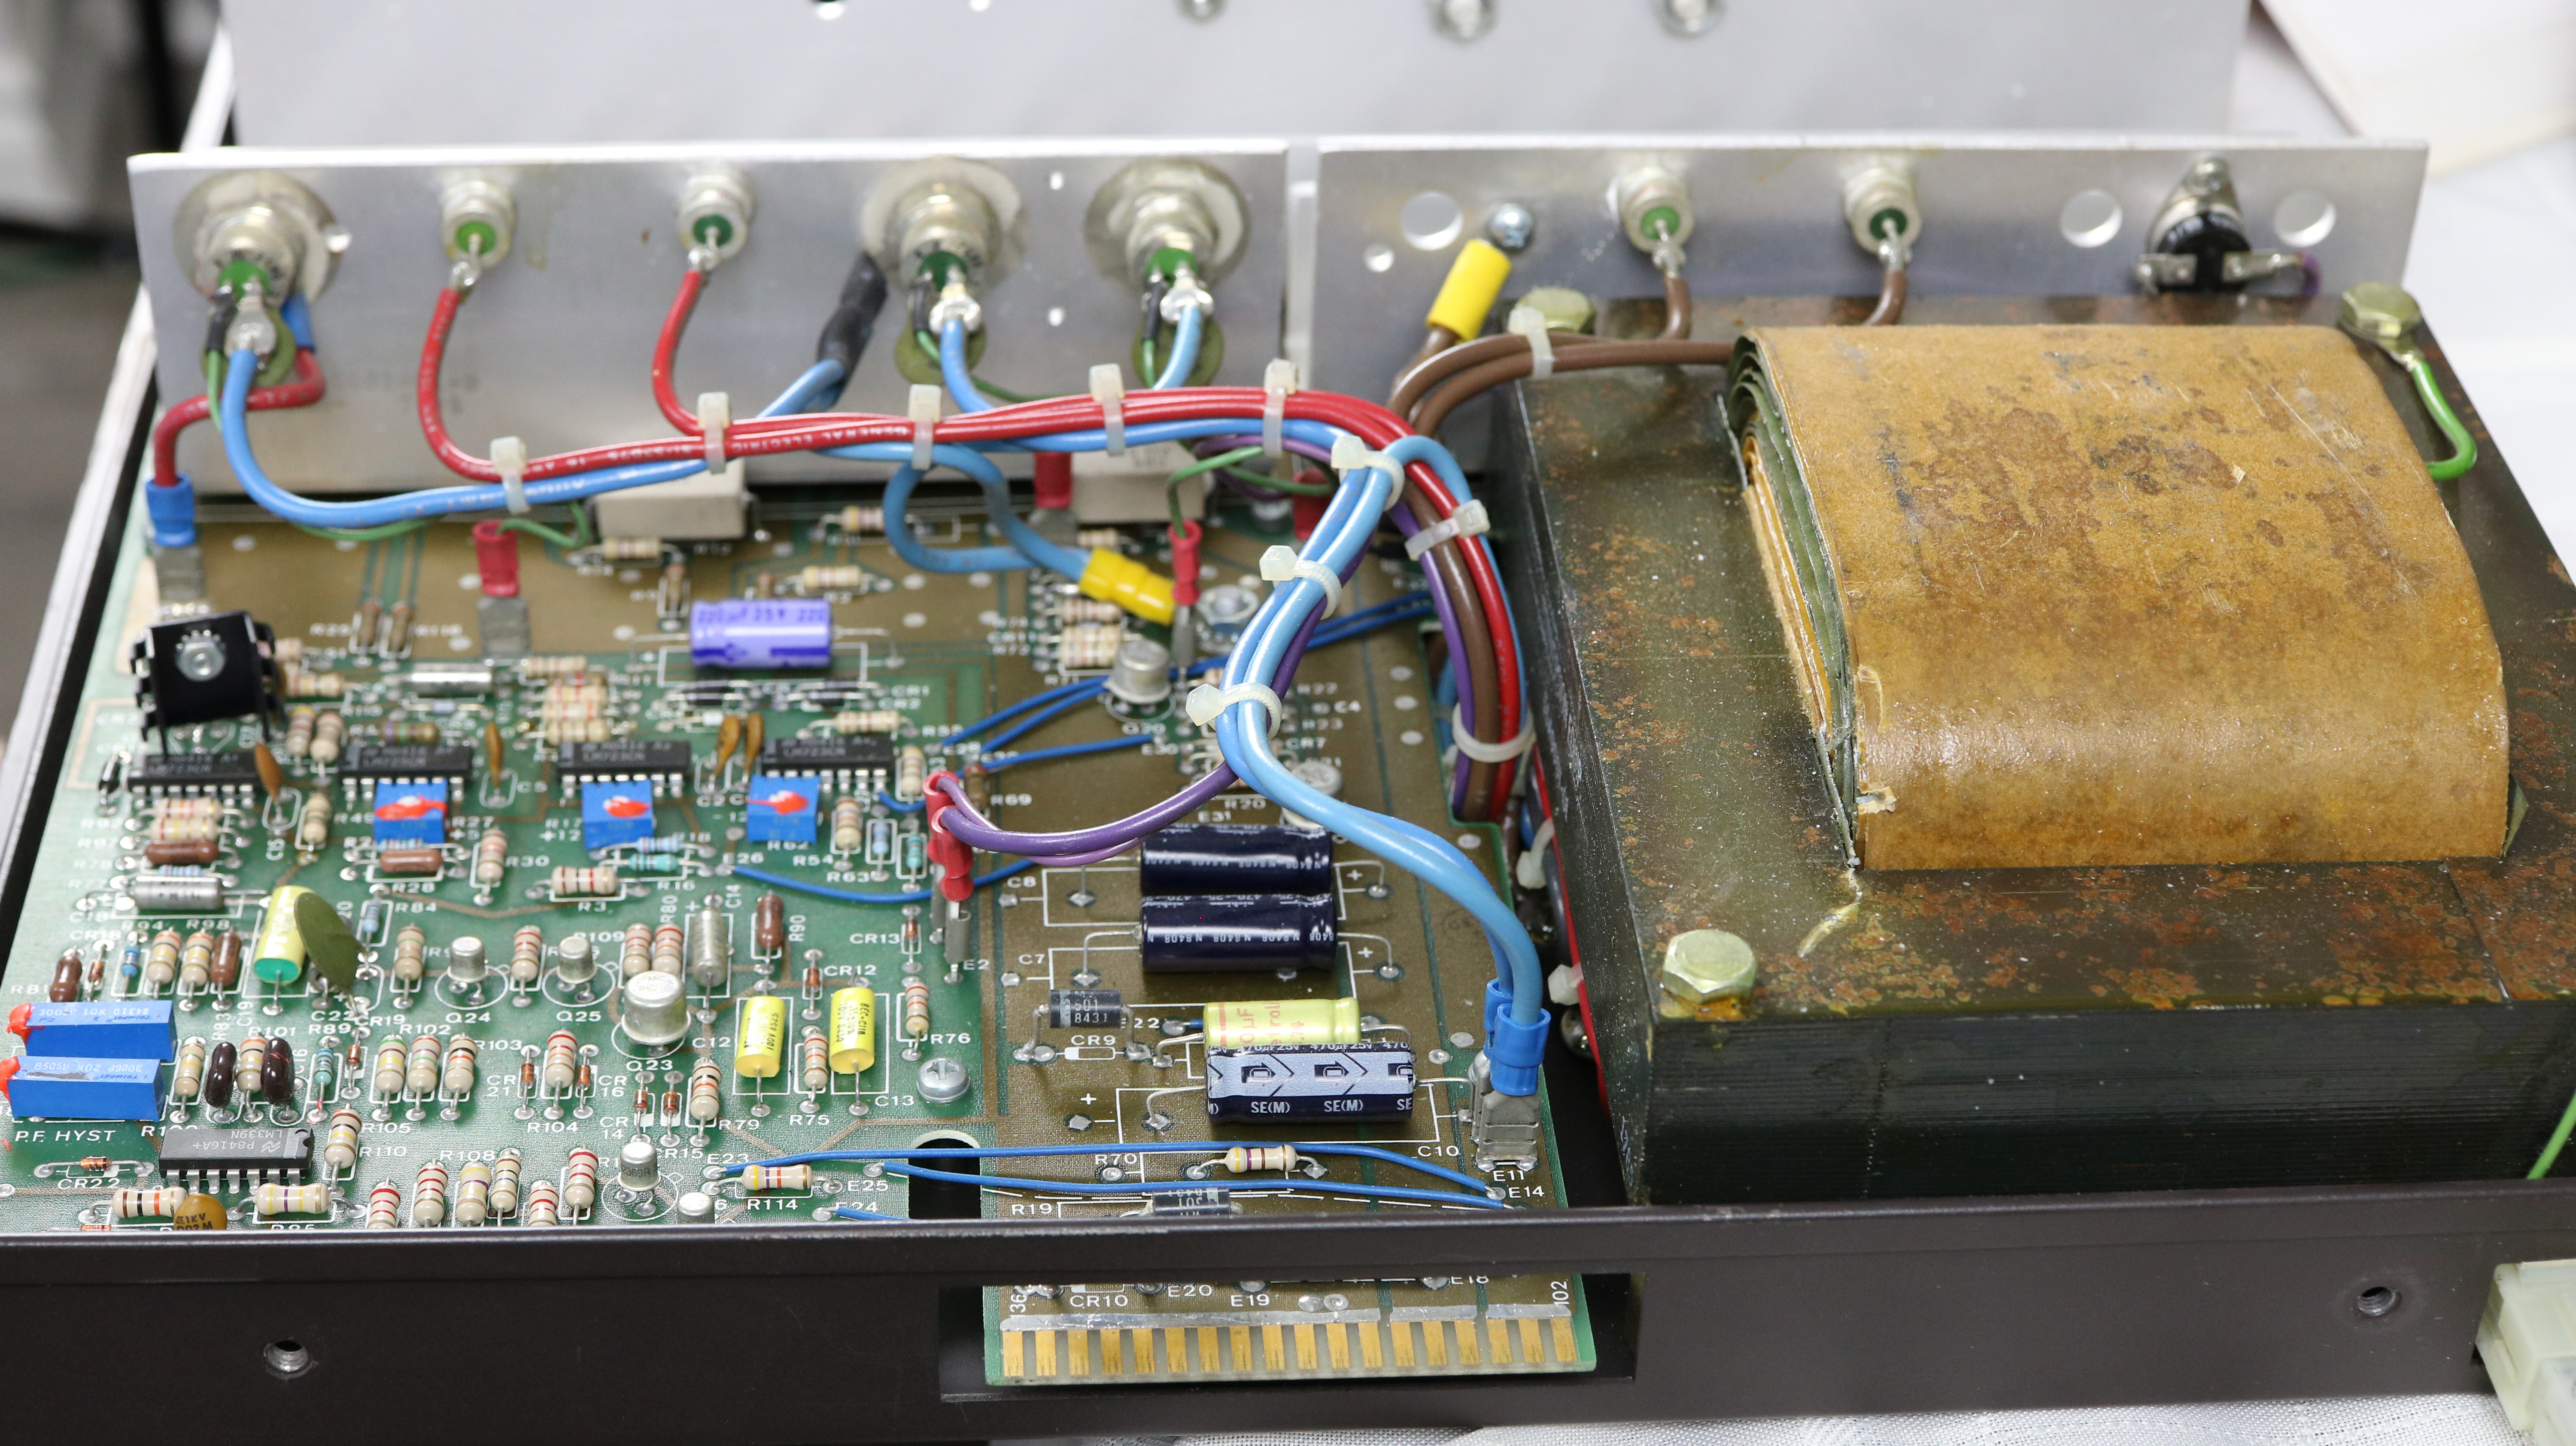
25 amp Alpha LSI 2 linear DC power supply
I had removed the power supply from the chassis earlier to repair the card cage frame. I carefully inspected it for damage and for bad leaky filter capacitors. Bad capacitors are the bane of vintage computers. They can leak and destroy other parts and circuit boards, or they can fail after decades due to changes in their internal chemistry. They can fail partially, or completely open, or short – possibly destroying the power supply when connected to power.
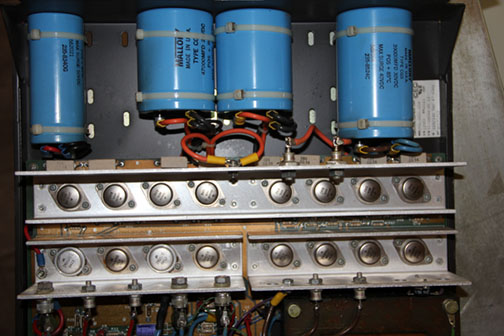
Alpha LSI 2 linear DC power supply filter capacitors and regulators
However, everything looked great – like new. It is a paradox in vintage computers that older equipment from the 1970’s seldom has failed capacitors, while products from the 1980’s and even 1990’s can have many bad capacitors today – perhaps because the production volume was much higher in later years, the quality or manufacturing technology was cost optimized and not as good.
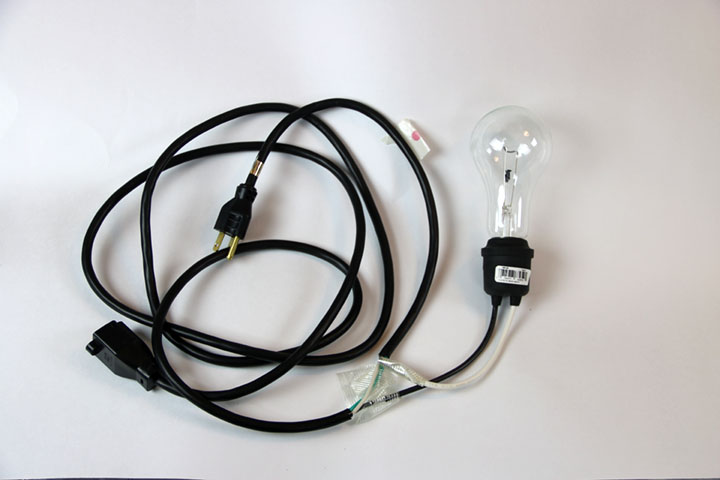
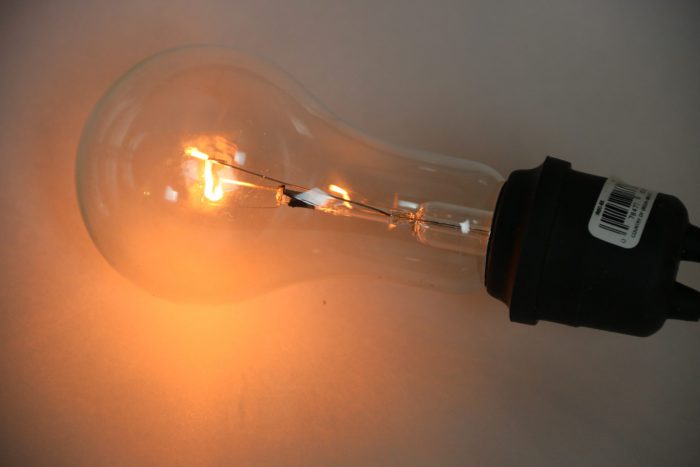
I built a current limiting rig to ensure that I didn’t burn everything up if there was a short circuit or a bad capacitor. It is simply a 150 watt incandescent light bulb in series with the 110 VAC input line. The bulb’s resistance would limit the current to around 1 amp. By the way – it is hard to find an incandescent light bulb these days! Finally, I found one at Home Depot – it was labeled as a “utility lamp” – it was clear and had a wire filament inside, so I could be sure it was not a CFL (Compact Fluorescent Light) or LED lamp.
I gathered my courage and turned on the power! With the deafening sound of a Boeing 747 accelerating for takeoff, the three 5 inch 110vac fans roared into life. No smoke or sparks!!! The series current limiting lamp glowed dimly indicating a normal “no-load” current flow (since the power supply was not connected to the motherboard) with no big shorts. I quickly turned the power back off with a sigh of relief!
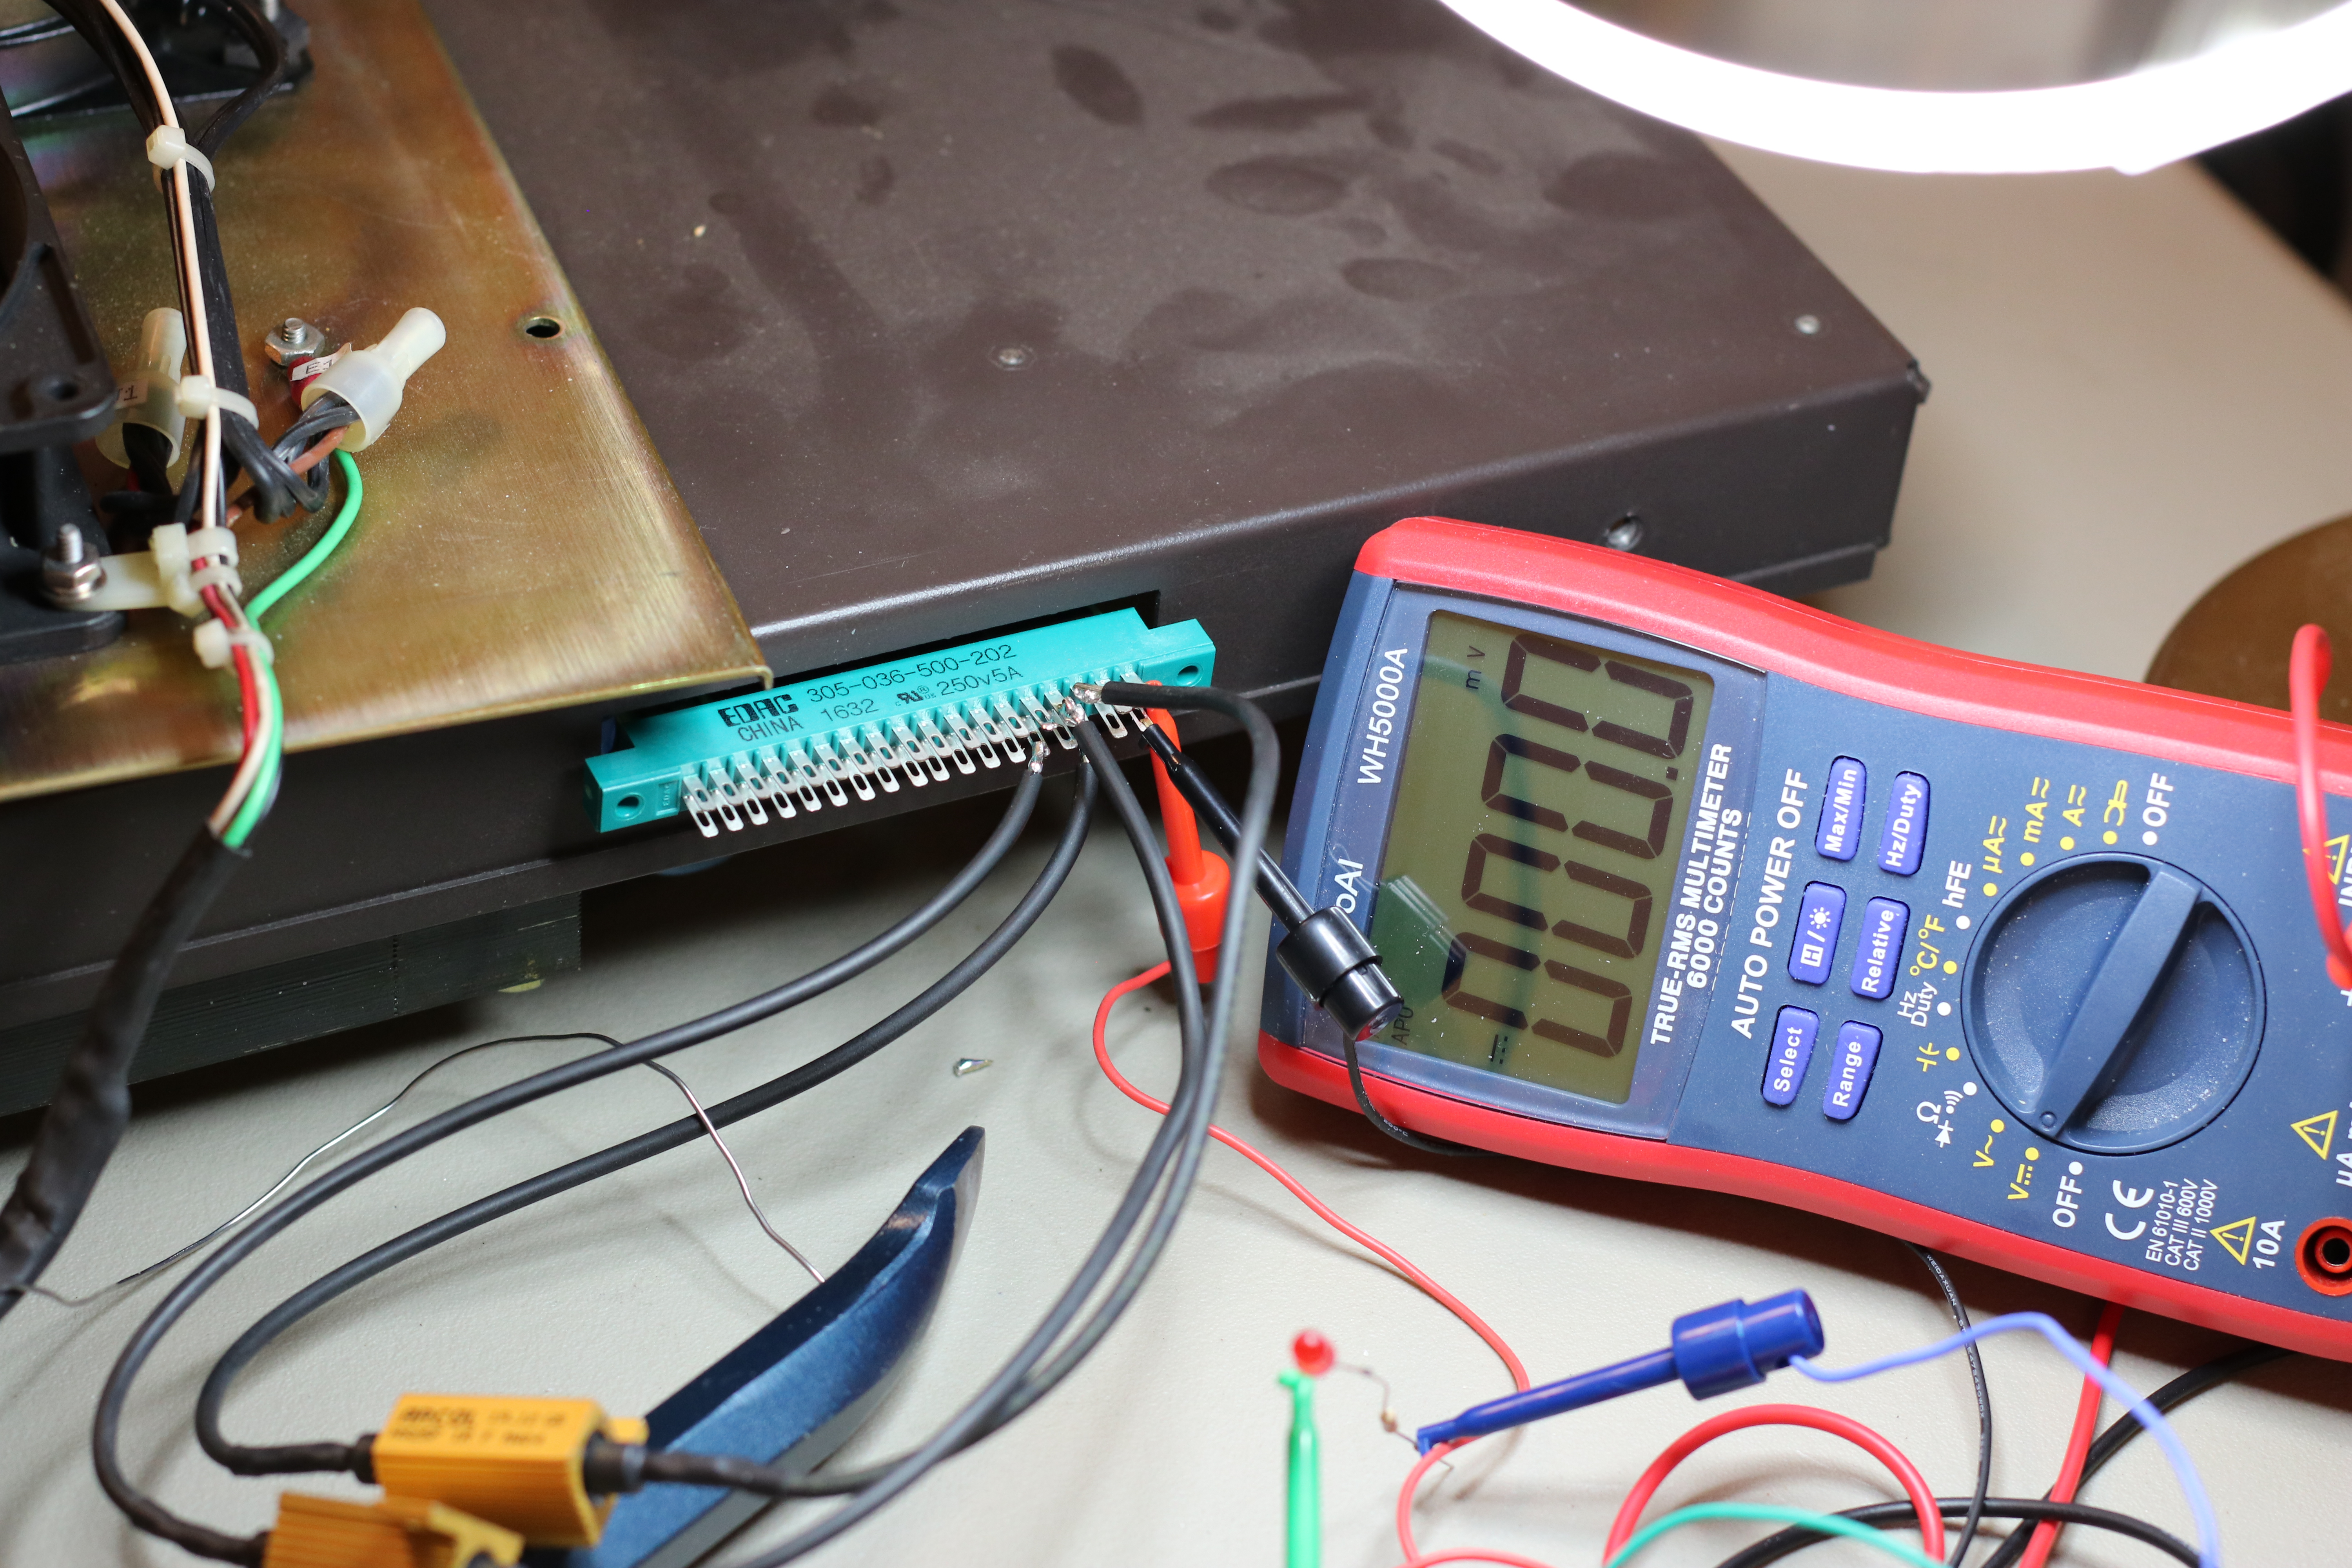
Now I needed to test the power supply output. I had ordered some power resistors to use as a dummy load test so I wouldn’t risk damaging the circuit boards. Two 1 ohm, 1% 25 watt wire-wound resistors would give me 0.5 ohm at 50 watts in parallel. 5 VDC/0.5 ohm = 10 amps and 50 Watts load.
Measuring the voltage under load would provide a good indication of the health of the power supply and regulators. I got rock solid 5 VDC power at 10 amps load. Boy, those resistors get really hot fast when running at their max rating of 25 watts each!
A Mighty Wind
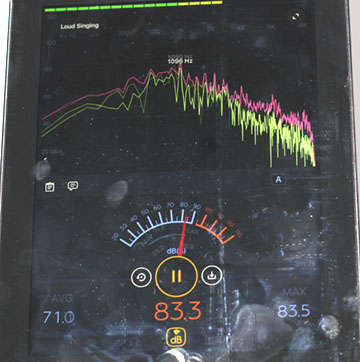
Finally, I needed to fix the fans… They were not bearable to be in the same room with. My iPad sound level meter showed over 80 dB — about the same as standing next to a motorcycle with bad or no mufflers. In contrast the normal room ambient noise was around 35 db.
I thought that probably the bearings were dry and/or bad from age. These fans had 110 CFM airflow rating – the highest available for a 5″ fan. Model ETRI 125 XR. I looked online and they were still being sold new – 40 years later – but for $125.00 each plus shipping. These three fans could cost me more than the computer. And there were no NOS (new old stock) or used ones on ebay.com that matched this model.
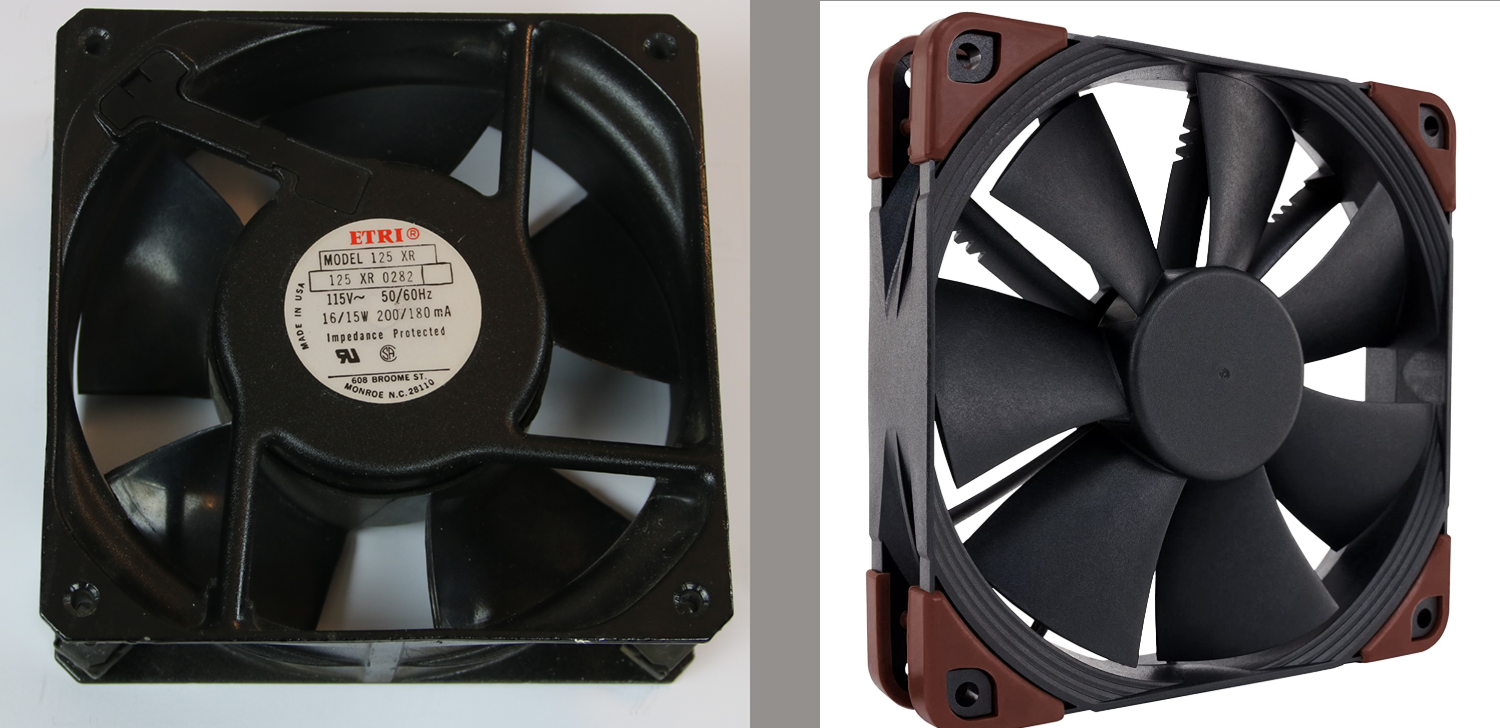
Original ETRI fan and new Noctura PWM fan
Getting creative, I thought about modernization… where do people use high volume fans today – overclocked gaming personal computers! And they want them to be quiet. I looked on Amazon.com and found the perfect match – Noctua NF-F12 iPPC 3000 PWM, 4-Pin, Heavy Duty Cooling Fan with 3000RPM (120mm, Black) . Plus, this is a 12 vdc variable speed fan with PWM speed control, so I could build a simple temperature sensor and set the speed (and noise level) based on the internal temperature of the case. And they cost just $25.95 each with free Prime shipping.
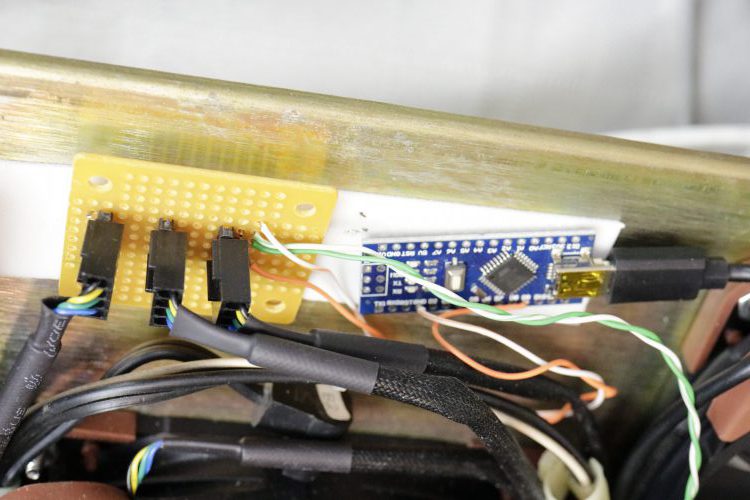
I built a PWM fan speed controller with a $6.00 Arduino Nano clone micro-controller board, and now when I turn on the Alpha LSI, I can work on it without going deaf. And the computer is cool and happy.
March 2020
Since it arrived, I have done a lot of work on the Alpha LSI 2. Besides checking the power supply and replacing the fans, I have installed the LSI/20 CPU with Daughter Card and later the TTY/Autoload CPU option cards which I bought separately on ebay.com.
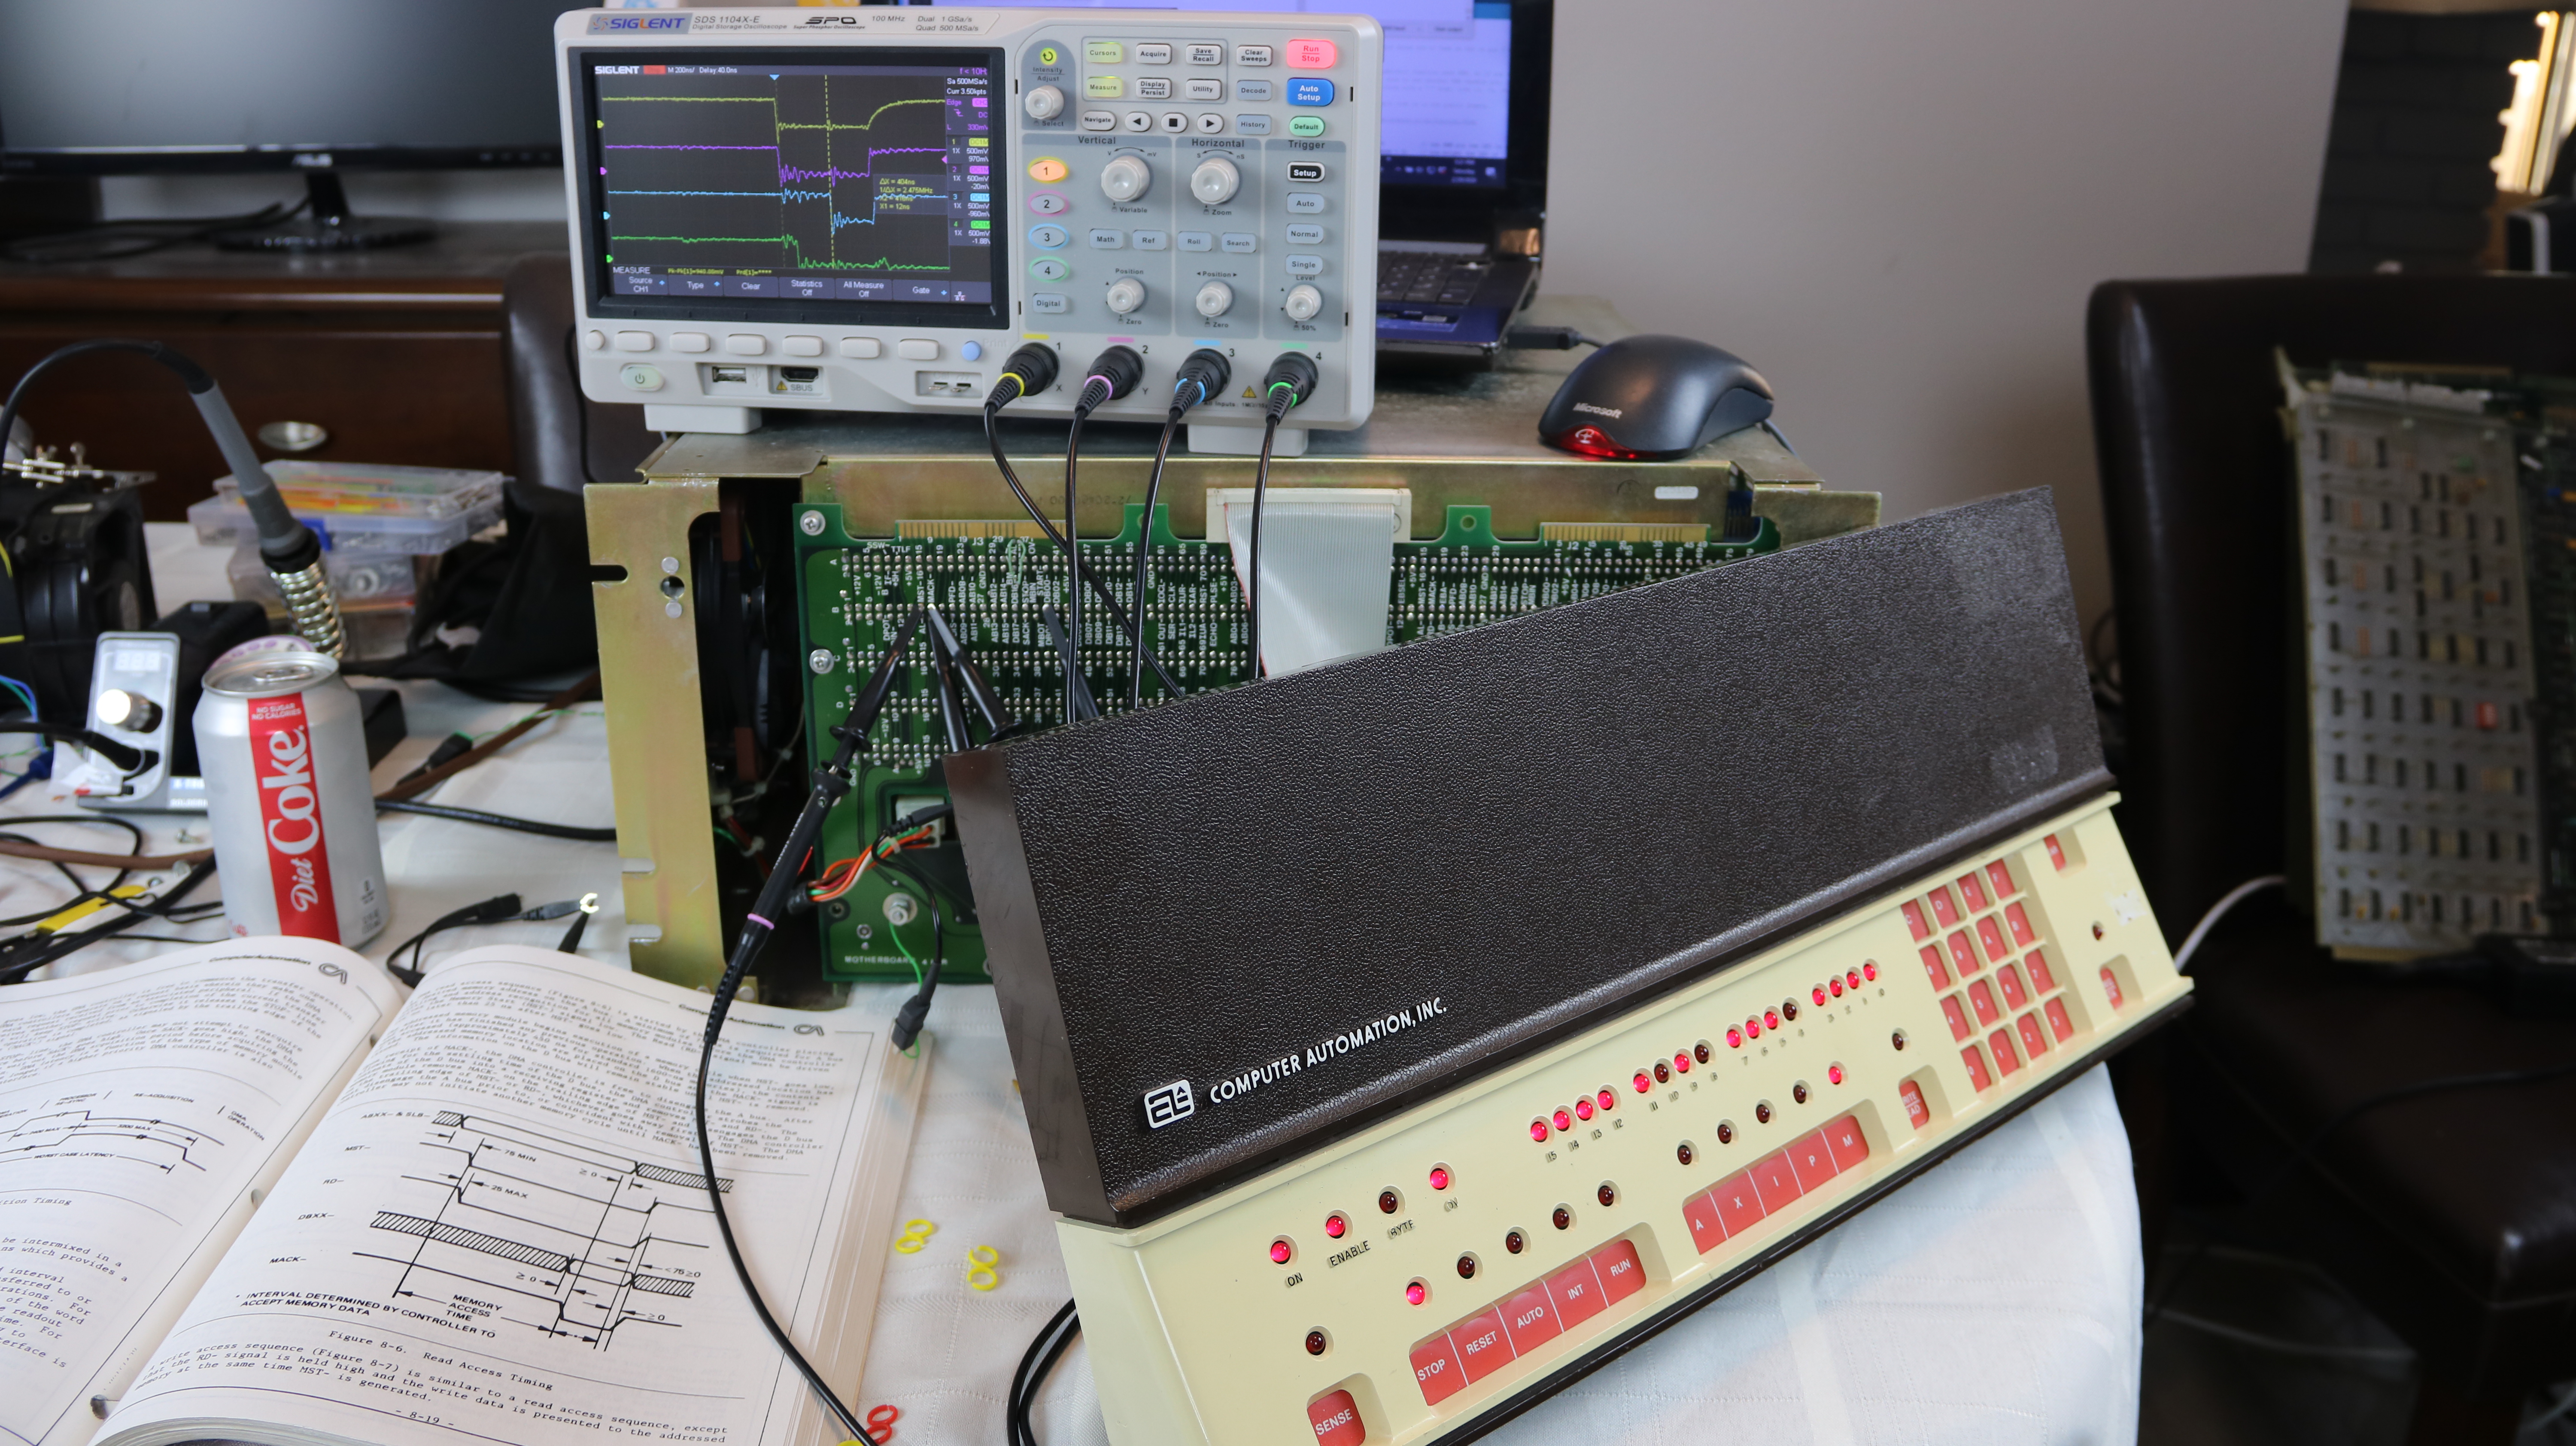
Checking memory bus waveforms with Computer Automation LSI 2
Since I had collected an assortment of CPU, option, and memory boards from my eBay searches, the next task was to see if anything actually would work in the chassis with the tested power supply and new fans. I tested various combinations of CPU board, daughter board, and memory boards to see if anything just worked. No luck! I got a few front panel lights, but the CPU did not respond to the front panel switches properly and kept jumping into RUN mode whenever I tried to load data into memory.
I took out all the cards again, and realized the card edge connectors might be dirty or not full inserted into the mother board. I used DEOXIT® GOLD to clean the card edge connectors. It takes some force to plug in the CPU card since it has two edge connectors and is very large (19×24″). I tried re-seating the large cards in the motherboard sockets, and once I got everything properly installed I turned on the power and the front panel lit up completely.
Along with the CPU and daughter card (with the micro-code ROMS), I also installed a 16 bit x 32 K word dynamic RAM memory half card – a later generation that followed the magnetic core memories (4k, 8k, and 16k) that were used through the 1970’s until the price of semi-conductor memory decreased and became competitive with magnetic core memory. I had tried the core memories I have first, but they didn’t work when I was first testing and still trying to get something to run. I haven’t gone back to re-try them now that I have a winning combination of CPU boards that seem to function well.
As part of the start-up testing process, I used my 4 channel digital oscilloscope to analyze the LSI-2 MAXI-BUS signals to see if the CPU and memory access were working. The Computer Automation manuals available online and the physical manuals I had found on eBay were a great help. The standard documentation shows all of the bus wave forms and signals in full detail.
The amazing thing was that the memory and bus signals I was seeing on my 21st century color digital scope almost exactly matched the waveform and timing diagrams in the 45 year old Alpha LSI-2 technical manual! It was actually working.
I had to re-learn the front panel procedures to get the manual data input process correct, but finally I was able to write data to memory and then read it back through the front panel console and leds.
Documentation and Software
I have also done a lot of research and have contacted a number of Computer Automation resources. I have located a number of critical manuals and software images through various Internet groups and archives which will allow me to make the system fully functional.
I found a bunch of original printed Computer Automation software manuals for sale on ebay.com – located of all places in Montana. There was also a full printed LSI-2 Series Minicomputer Handbook with the LSI-2/40 supplementary manual. This later model used a different CPU Board that had additional LSI (large scale integration) chips allowing the CPU Daughter and option board circuits to be included on the main board.
In the search for information, I have found a lot of information on bitsavers.org (part of the Internet Archive) . I also was directed to a defunct Computer Automation Museum website (from Sweden) that was partially saved on the Internet Archive. These sites had software (paper tape and disk images) and documents including hardware and software manuals and even schematics for several LSI-2 boards.
The one manual I really needed was one of the most common documents (besides the reference manual) provided with the Computer Automation computers – the standard LSI Software Manual which documented all of the software tools provided on paper tape with every Computer Automation LSI-2 computer. This included full documentation on the symbolic assemblers and object loaders used to create and load programs for the computer, plus the diagnostics and the linkable standard utility libraries.
Unfortunately, this manual was not available in any of the online archives I had found. Without this documentation, it would be very difficult to write and load programs into the system, even if I could get the standard software paper tape images I had found loaded into the computer.
Through suggestions from Al Kossow who runs the bitsavers.org project and also works with the Computer History Museum in Mountain View, CA., I posted on a vintage computer mailing list ( cctalk@classiccmp.org) and located a collector in Sweden who had this critical documentation on the LSI-2 software tools he had inherited from his uncle, and was kind enough to scan it for me. I was unable to find this standard LSI Software Manual anywhere in archives but he had a copy in Sweden. He also sent me links to a private CAI document archive at Stockholm University with other manuals including several later Operating Systems and info on the LSI-4 series computers.
June 2020 – Starting a Collection…
I have recently acquired two more Alpha LSI 2 Minicomputers. The first one was in Los Angeles – I found it on eBay – it was in rough condition, but with a complete set of boards. The person I purchased it from had bought it at a local estate sale.
This is a very early model of the LSI-2, probably made near the end of 1973 or early 1974, as most of the ICs on the CPU are dated in 7340-50 week range, and the Data Products core memory is date coded 7405.
I found the second LSI-2 while watching a video on YouTube made on Aug 31, 2017 by Curious Marc when he visited a computer collector in the SF bay area. Bob Rosenbloom’s vintage computer collection in Santa Cruz, CA. is one of the largest private collections in the USA. The video shows Bob’s incredible collection of hundreds of vintage computers and terminals.
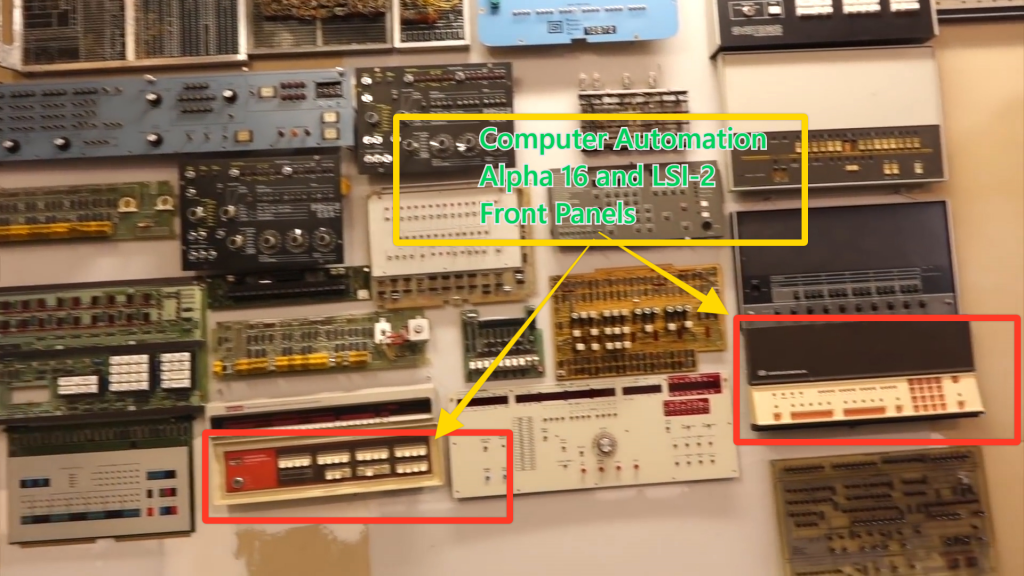
The first thing I noticed in the video was Bob’s collection of 1970’s minicomputer front panels on the wall of his workshop. He had both the Alpha 16 and Alpha LSI-2 front panels there!
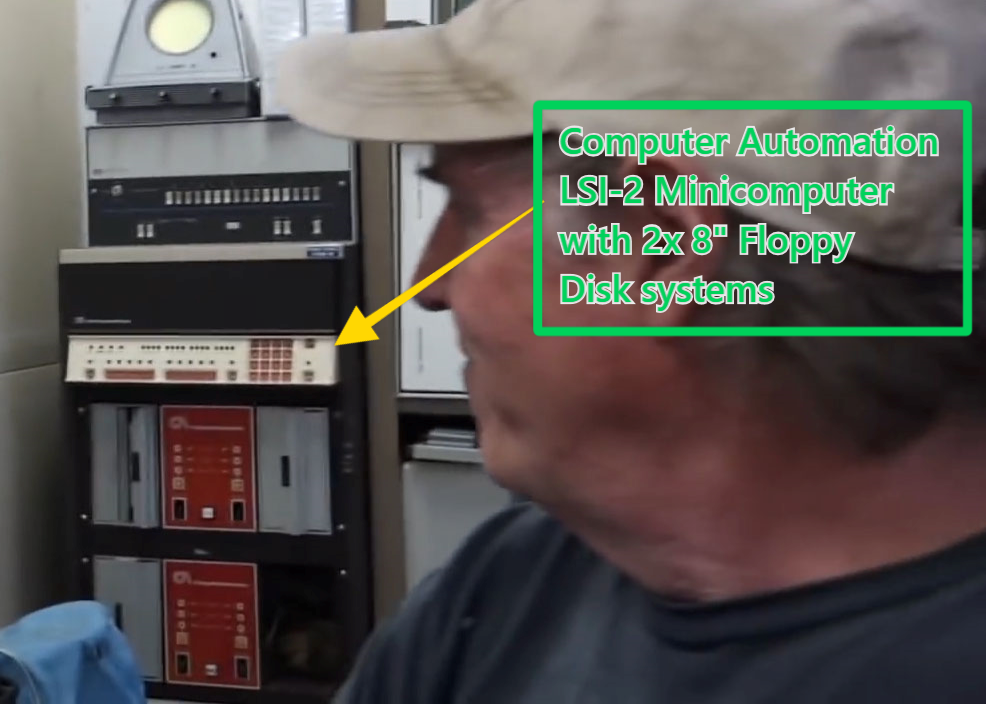
Next, while Marc was panning around I saw a complete Computer Automation LSI-2 system in a rack with two 8″ disk drive systems in the background. It looked like one drive was missing, but otherwise was in good shape. Unfortunately, I found out later that this system had already been sent to the Living Computer Museum in Seattle.
Bob is reducing his collection to focus on just early DEC minicomputers, and so is offering many of the rare items in his collection.
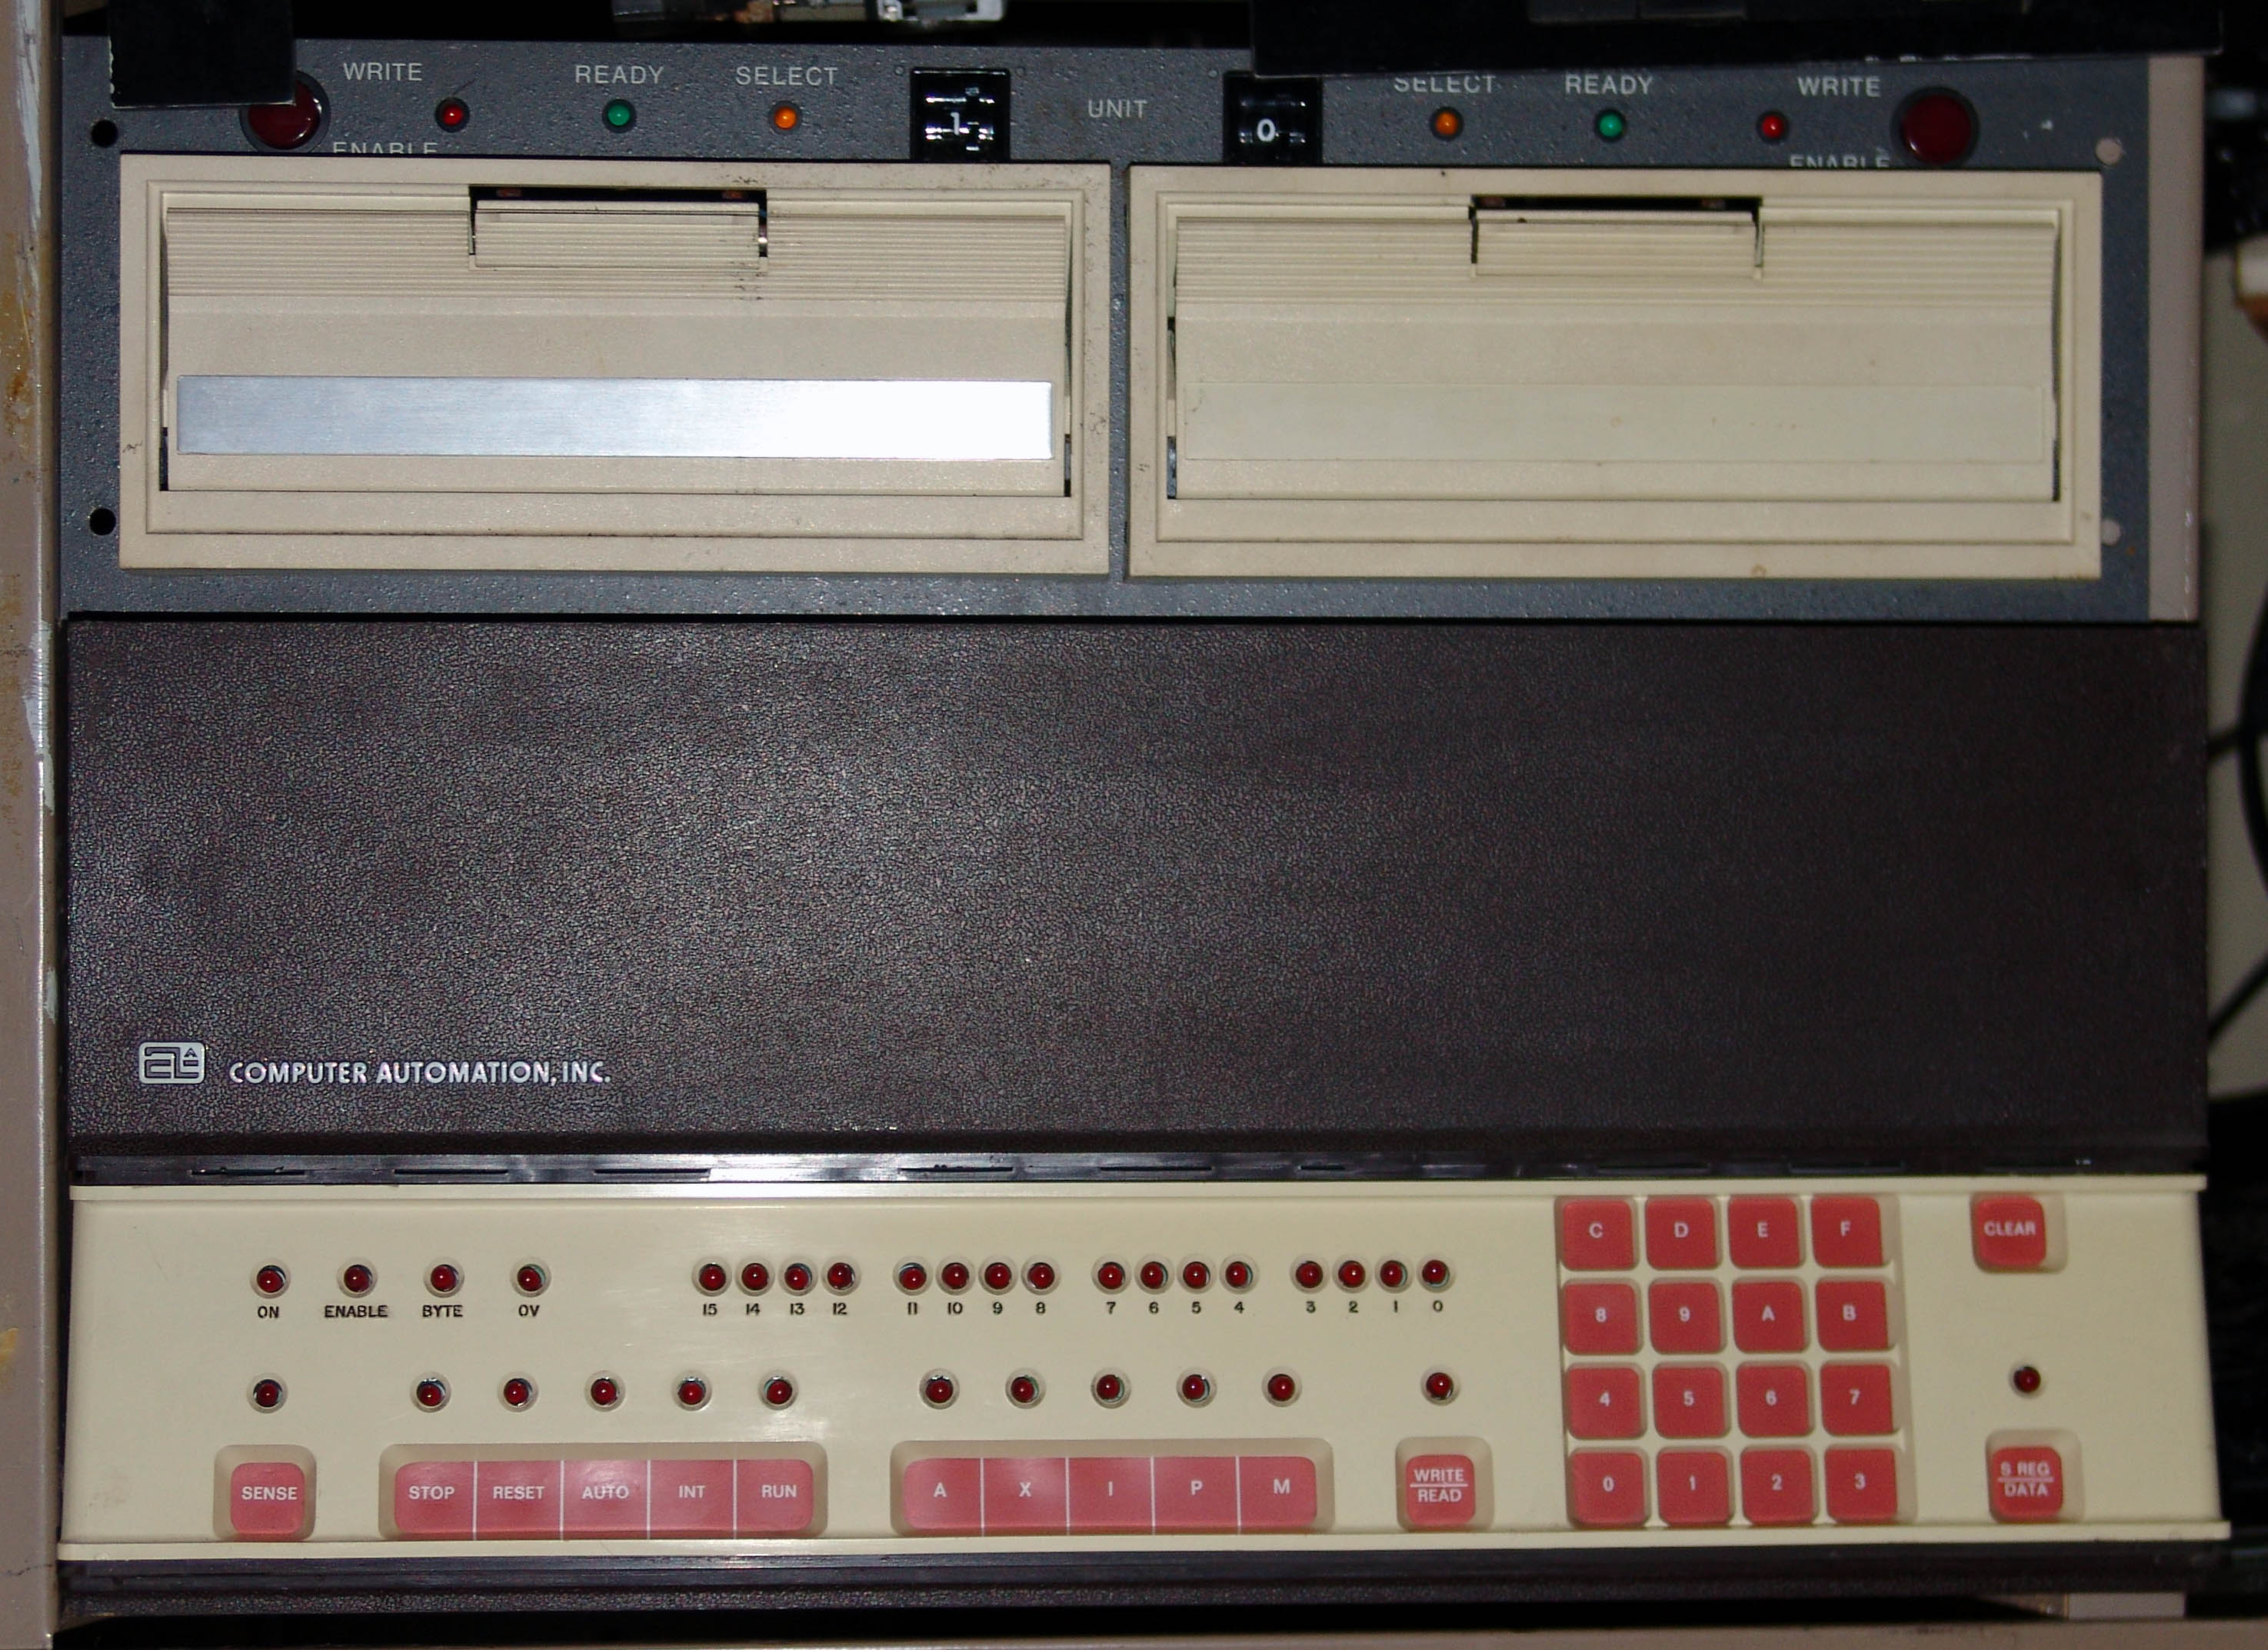
The remaining one I was able to buy from Bob is in good condition and has just arrived. It even has a pair of 8″ CalComp floppy drives and some spare boards.

3 Comments
Great stuff David. I truly look forward to your reports. I’m learning just how alien the mini computer is to me, and I love it!
Can you tell me more about your core memory board, why it may have failed, and what type of issues you may have run into using this type of storage in the past? It seems to me that it’s truly a solid-state device. Looking at a CA core memory board, I see there is a lot of ancillary circuitry. I presume these supply and multiplex the reading and writing currents, assemble bytes from the matrix, and then buffer the info for transfer.
What could possibly go wrong? Ha!
Hello,
I found your blog while searching for more information on some recently acquired vintage boards a friend and I found while prospecting the urban jungle.
Most are “Computer Automation Naked Mini” with various dates from 1971 to 1980.
I have nearly all the boards you mentioned and allot more. message me if your interested.
Thanks!
Hi Tom,
I am also bringing an LSI-2 back into operating condition. My system is a Naked Mini LSI-2/20 that had integrated two 8” floppy drives, a CRT, and a keyboard. The hardware interface for the latter two is custom built by Princeton Gamma Tech (PGT).
Having acquired an Alpha programming console, I decided to start it back up as an Alpha LSI. After learning the system functionality, I may try working with the PGT hardware to revert the system back into a proper terminal interfaced mini.
I would be very interested in any hardware you may hold. Can you provide a list of what you have?
Thank You,
Andrew Hendershot